DCP Setup Maker
Once the program launched for the first time on a computer, an assistant will be presented to explain what to do in the different steps to finally build your package successfully.
You can at any time press the question mark at the top right corner or press the [F1] key to display the assistant.
Vocabulary:
| Pack: | can be a file, folder or archive containing many files to include in the setup |
| Group: | a set of Packs |
| Install Group: | a set of Packs and Groups |
| Package: | the final Setup file |
1 - Scan the directory containing the files you want to include in your package:
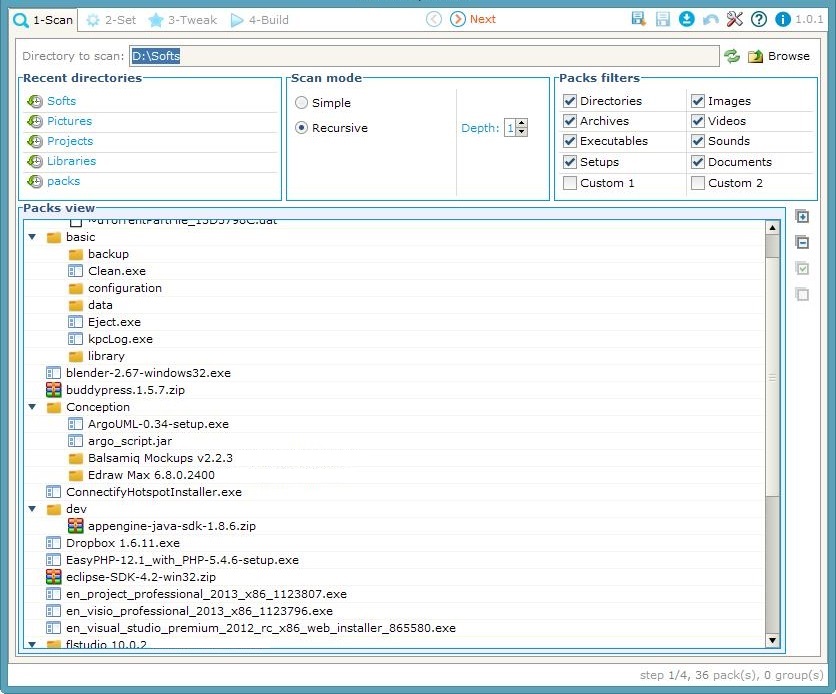 Press the Browse button to choose a directory containing all of the files you need in your installer,
then filter some of them if you need so. A 'simple scan' treats folders as single packs, and 'recursive
scan' gets packs from inside directories until 'depth' is reached.
Press the Browse button to choose a directory containing all of the files you need in your installer,
then filter some of them if you need so. A 'simple scan' treats folders as single packs, and 'recursive
scan' gets packs from inside directories until 'depth' is reached.Press Next when list of files is ready..
2 - Set the parameters of your files:

The second step lets you set the properties for each of your packs (files) and even organize them by Groups/Install groups. You add a new group using the green '+' button at right, and entering its name then you may use the Add button at left of packs or Drag and Drop them to a group.
In the case of a 'Recursive Scan', you can import the scanned directories structure as groups using the 'import' button at right.
Then you start setting your packs..
- A pack is displayed by its 'name' and can't have the same name as another Pack or Group.
- A 'required' pack can't be disabled on install.
- A 'selected' pack is preselected on install.
- A Pack may 'depend' on another Pack or a Group of them so it won't be installed unless all dependencies are selected.
- Packs can be part of one or many 'install groups' separated by comma.
- A 'shortcut' can be created for a pack to access it directly.
- A Pack is either 'executed' during install process, 'copied' entirely or 'extracted' to 'install path'.
- The 'Install path' of a pack is relative to the global install path of setup (Tweak tab).
Once all your packs and groups set, you press Next..
3 - Tweak the final custom settings for your application to be ready:
 Finally, you add some information for your package like the application name and version number.
Additionally, you can add some resources like a Readme file, License, Images, and set the desired target path for your packs and shortcuts, and even more...
- A 'forced' install path can't be modified on install.
- 'Langpacks' are different languages ready for installer's text.
- A 'version check' enabled installer check Windows' registry for installed version.
When finished, push Next..
At this point you may have done a lot of settings that could take a long time to do again if you needed the same configurations or to rebuild the same package with few modifications.
So don't forget to press the "Save As" button at the top right corner or by pressing [CTRL+S] to save your project, and thus being able to load it in the future.
You may also save the default configurations if you think some settings are definite and won't change for all of your packaging projects by pressing the "Save Defaults" button on the top right corner.
Your package is ready to be packaged at the given export path. You just have to set the target path and then 'Compile'.

Once the build is successful, you may 'Launch' the resulting package or 'Debug' it for advanced bug tracking.
Don't forget to 'save' your project to 'load' it later, and if you feel like it'll make your future work easier, 'save default' settings ;)
For developers who want more possibilities, they can edit the settings.json file to just generate the IzPack files, edit them using some IzPack code, then compile.
Look at the FAQ for more tips on how to use DCP Setup Maker.
Enjoy packaging! ;)